Party Time!
 For Gooba's 3rd birthday I gave her a few choices of what kind of party to have and her #1 choice was Tinkerbell! I must admit I had A LOT of fun planning this party for her - and the best part was, everything was super cheap and easy!
THE FAVORS
THE FOOD!
My personal favorite part!
MAGIC WANDS
I made rice krispie treats and cut stars out of them once they were cooled. Then I melted a few mini marshmallows at a time on a plate to use as "glue." Then I stuck the pretzel rod onto the stars with the marshmallow glue. It wasn't happening without the marshmallow glue. These were a big hit!
BIRD'S NESTS
Then I made these adorable little bird's nest by melting butterscotch and chocolate chips - pouring them over lo mein noodles, stirring, and forming them (on parchment paper or wax paper) into little nests/blogs. Then I put 3 yogurt raisins on each one and put them in the fridge until they were nice a cold.
ACORNS
I LOVE how these turned out! They are mini Nilla Wafers (I had to by name brand, I couldn't find generic) "glued" onto Hershey's Kisses with peanut butter. A little time consuming - but totally cute!
TOADSTOOLS
These went the fastest out of everything. All I did was cut a mozzarella cheese stick into five pieces, spread cream cheese on the top and add a half of a cherry tomato. Then I took a toothpick and added the little dots of cream cheese. Again, a little time consuming, but we had a snow day before the party - so it worked out perfect :)
LADYBUGS
Essentially these are just fancy chocolate covered pretzels. These were the second attempt... attempt 1 I learned that I lack the skill of melting white chocolate and little pretzels fill up with chocolate and look like blobs. SO - I used larger thin pretzels and bought red candy melts from A.C. Moore. I melted the chocolate chips first in the microwave and dipped the heads and let harden completely (on parchment or wax paper) before I melted the red candy melts in the microwave and dipped the bodies. Once they were all hardened again I took a toothpick and added the chocolate spots from the original bin of melted chocolate and used white icing for the eyes.
RAINBOW FRUIT
My little Gooba LOVES fruit - like most little kids. My original plan was to make fruit wands or rainbows on a stick - but then I thought skewers and 3 year olds were not a good combination - so I just made a fruit tray instead. For the record - fruit in January is VERY expensive!
THE GAMES
We had a few games for the kids - but mostly we just let them run around and play.
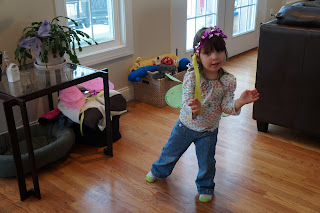
I love this picture of Gooba in her dress up clothes dancing. I bought two CDs recently at Walmart - Disney Princess Favorites and some sort of Disney Fairies CD. We rotated through both CDs a few times. Gooba will pretty much dance to anything!

FIND THE FAIRY
I bought two tubes of fairies at A.C. Moore and hid them around the house. Then I told all the kids that I had the fairies in a bowl before the party and that they all flew away and were hiding. Then they all went looking for the fairies and returned them to the bowl. They were FABULOUS at this - I wish I had hid them a little more sneaky!
PIN THE WAND ON THE FAIRY
&
BIRD'S NEST TOSS
I purchased a Secret of the Wings poster at Walmart and used my Cricut to cut out some stars out of yellow scrapbook paper and taped them to craft sticks. Then we played pin the wand on the fairy. I also filled three socks with beans and sewed them up to make beanbag eggs. I filled a green bucket with floral filler from Dollar Tree for the toss the eggs in the bird's nest game.
BEADS!
OK - this one was in no way fairy related, but Gooba LOVES making bracelets from pony beads and pipe cleaners - so I just bought two bags of pony beads from A.C. Moore and let the kids go crazy. We had about six kids and I found that two bags was WAY too many beads.... one bag would have been fine - but we'll use them another day - so no biggie!
Well that pretty much sums it up! We had a great time and everyone went home happy, tired, and with full bellies :) I can't believe my little girl is 3!


